Tuesday, March 18, 2014
Labels:
CTF
,
maccdc
MACCDC 2014: Sahana Eden Write-Up
This year, I was tasked to a linux box, even though my greater strength is in Windows. With the theme of this year's MACCDC being related to disaster recovery, I discovered the distro I had was Sahana Eden.

The tl;dr of this part is that I recommend once you learn of the MACCDC theme, look for related open-source linux distros (virtual appliances). Download a couple and mess around with them. Who knows, you might get lucky and pick the actual distro used in the qualifiers. At best, it will save you time once the competition starts and at worst you'll still learn to navigate your way around a linux box if you already aren't familiar.
What am I getting myself into?
Sahana Eden is, from their description:
... an Emergency Development ENvironment platform for rapid deployment of humanitarian response management. Its rich feature set can be rapidly customized to adapt to existing processes and integrate with existing systems to provide effective solutions for critical humanitarian needs management either prior to or during a crisis.If you'd like to download it yourself for experimentation, click here.
The Sahana Eden distro has webmin running by default, which coincidentally was a monitored service by the scorebot. Webmin, if you're not familiar (because I'd never seen it before!) is a web-based linux administration portal. By default, it was only accessible from internal addresses so you could only access it on the local host itself or from another asset. I debated trying to modify the configuration files to make it externally accessible, but since our Active Directory guy had his system set already I used his box to look at the webmin portal for anything useful. One less external vector for the red team, right? Since I'd never seen it, I originally assumed it was the web-app itself. Once I figured out that it wasn't, I was able to re-focus my attention on getting Sahana Eden up and running.
Sahana Eden Administration
First, let me say that the Sahana Eden documentation in terms of administration is not something you want to have to weed through during competition time, because the paths listed on the turnkeylinux site and the wiki are confusing and potential time-wasters.
The screenshot for Sahana Eden administration shows it being accessible via Web2Py:
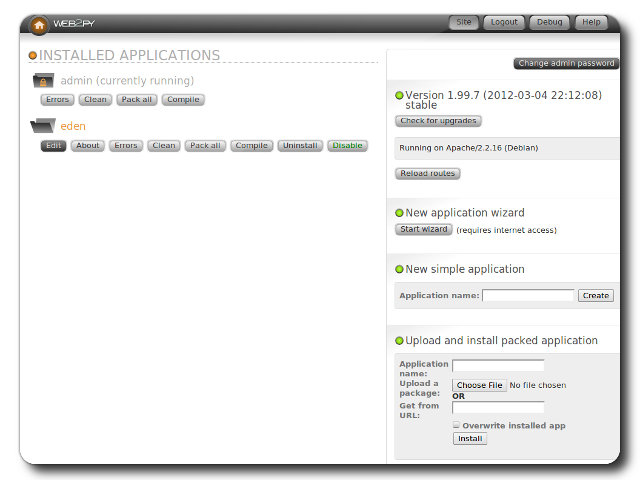

The screenshot for Sahana Eden administration shows it being accessible via Web2Py:
To clarify though, this isn't really web-app administration in the sense of application-specific settings. It's more about installing the eden app itself. So where then do you go to manage the app? Many web-apps have an administration portal off the customer-facing component, which is accessible after you log in. The customer-facing portal of Sahana Eden looks like this:
According to the turnkey linux page:
first registered user will become the administrative user account
Seems simple, right? Riiiiiiiight... Attempting to create a user resulted in a database error. That means I need to fix the database issue before I can register a user so that I can get into the web-app!
Sahana Eden's DBMS
By default, when you launch the /var/www/web2py main script, you'll see a note in the loading banner that unless otherwise specified in the config files the database management system will be sqlite3. When I checked, sqlite wasn't installed, hence the failure.
I did notice however that mysql was installed, and it happened to have an empty eden database. My guess is that the distro has the eden database in mysql preset via the web2py console. The questions then are: (1) how to point the web2py config files to use mysql instead of sqlite3, and (2) how to populate the database with what's necessary to create the admin account.
To save time, just go to the Wiki's Virtual Machine Installation Guide and scroll down to the Next Steps section. We need to modify two files:
web2py/applications/eden/models/000_config.py
web2py/applications/eden/models/zzz_1st_run.py
The config.py file has all settings necessary to point web2py to use the mysql instance, so you can make the necessary changes there (NOTE: I backed up the existing file first to have something to revert to).
The 1st_run.py file will generate the tables, etc. in the mysql instance.
After re-launching web2py, the app will now be pointed to an installed DBMS and allow you to create the user, so you can then take a look around at the app and maybe complete an inject or two. wink, wink
Good Luck!
Subscribe to:
Post Comments
(
Atom
)


No comments :
Post a Comment