Showing posts with label PowerEdge 2950. Show all posts
Showing posts with label PowerEdge 2950. Show all posts
Friday, August 23, 2013
Labels:
Dell
,
noise reduction
,
PowerEdge 2950
Dell PowerEdge 2950: Silence the Noise, Kevin's Chassis Fan Fix
This post relates the tale of our brother-in-arms Kevin, who valiantly pursued the quest to silence the PowerEdge 2950 with dogged determination. The focus here is on the chassis fans. I'll post another entry regarding his efforts to swap out the power supply fans and hack the BMI. And now, to the fixes.
Read More
Step 1: Update the BMC firmware
After updating the Baseboard Management Controller firmware, the fan speed slopes changed. The fans now have a lower minimum speed and are noticeably quieter. Dell Poweredge 2950 BMC firmware update v.2.50, A00
Step 2: Replacement fans
I selected the Top Motor FA60TM3BMP as a replacement, since the FA60TM3BEP isn't carried any more by BestByte.com. A representative at BestByte named Barry was very helpful in referencing the spec sheet for top motor fans they did carry.
The Top Motors seem to be just a re-brand of Dynatron parts. According to the spec sheet the Top Motor FA60TM3BMP corresponds to the Dynatron DF126025_M. With 7000RPM, 38.28cfm, 48.1 DBA, and 13.55 mm/H2O of static pressure, these fans should give an acceptable margin for error.
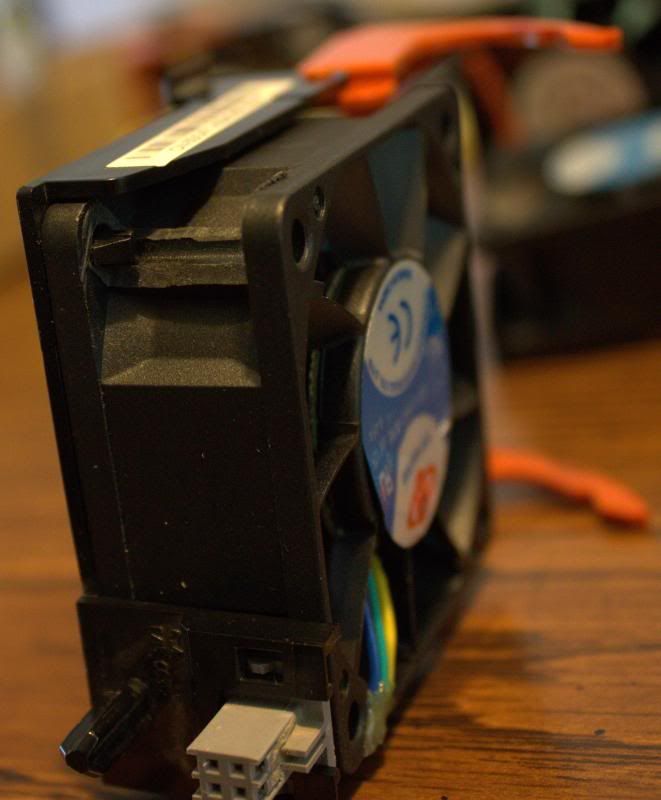
Now for the frustrating parts. All the replacement fans needed to have their connectors swapped with the stock fans, as well as having the closed mounting holes opened up. A simple re-pin didn't work because the pins are not compatible for a simple swap. Specifically, the Top Motor pins were too large for the stock fan connector.
The solution:
Also of note is that the power supplies had the same high speed fans as the stock cpu coolers. Solder swapping the connectors for those as well with two more Top Motors resulted in the server failing to get past the first POST screen when the power supply fans are at too low of an RPM. For the time being, the stock PSU fans were reinstalled, but the planned solution is to hack the BMC.
- Simply cut the wires:
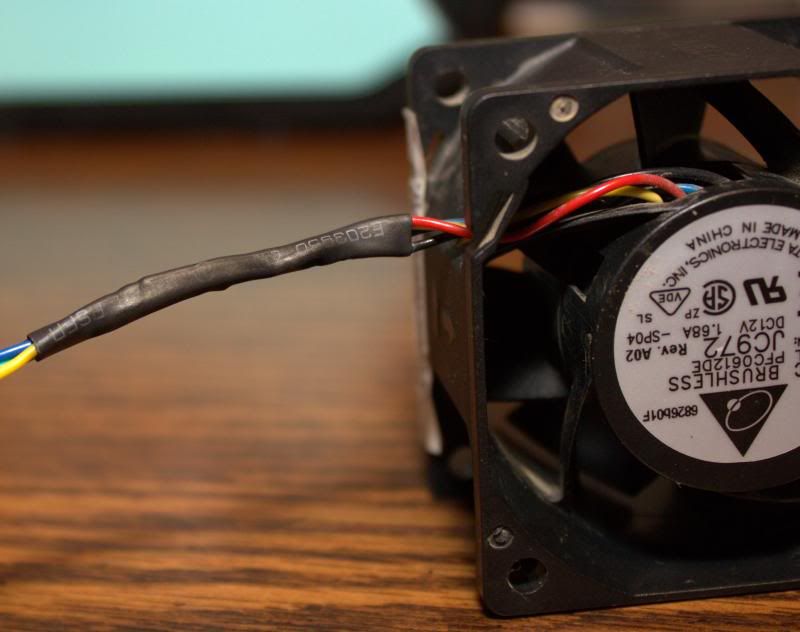
- Swap the connector leads, solder the wires back together, and apply some heat shrink tubing:
Voila! Some Top Motor fans with proper connectors. - Used a hacksaw, long handled pliers, and a Dremel cutting wheel to open up the closed mounting holes:
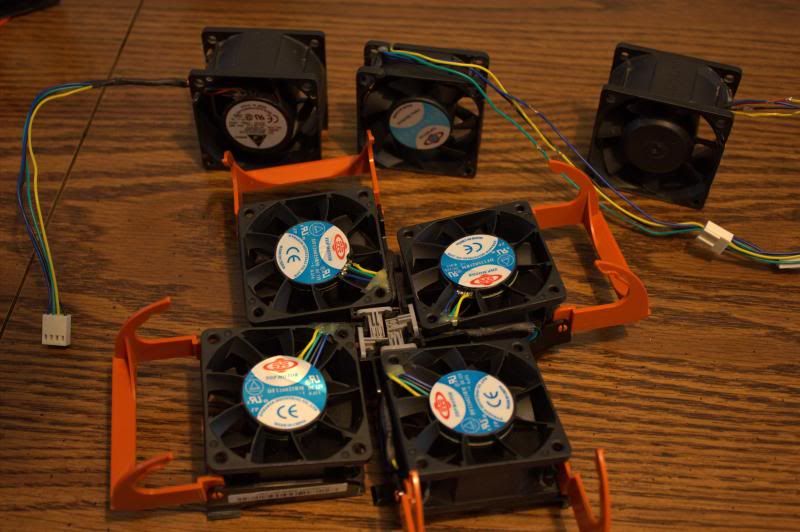
- Modified fans in cages:
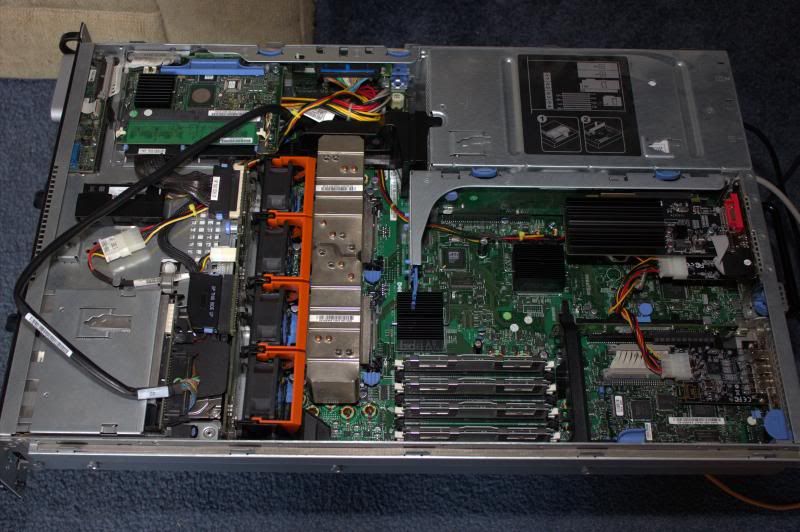
- Modified fans installed:
- Results:
Poweredge 2950 at idle with modified fans
Poweredge 2950 at full load with modified fans
Some users on the Hacking guide thread have commented that the BMC hacking guide works on the 2900 as well as the 2800, and by extension the 2950.
One more thing. Unrelated but someone may find it useful. I was able to replace a 2950 Gen I motherboard for a 2950 Gen II motherboard and everything worked just fine. No weird boot up issues or anything. With the Gen II motherboard I now have quad core cpu capability, and I was able to install those nice quad cores without issue.


Friday, April 26, 2013
Labels:
Dell
,
noise reduction
,
PowerEdge 2950
Dell PowerEdge 2950: Silence the Noise, Part 2
First, a thank you to Neil for spurring my renewed energy into finding a solution to the 2950's noise level. For the background of this project, check out Silence the Noise, Part 1. In this post, I relate my research findings from my search for suitable fan replacements.

The Fans
To find a suitable replacement, we must first analyze the existing fans so we know the baseline for comparison. Dell PowerEdge 2950's come with Delta brushless, axial fans in a 60mm x 60mm x 38mm form factor. Dell appeared to utilize three variants, with Dell-approved replacement part numbers including JC972, PR272, YW880, and DC471. The ones in my 2950 are JC972, for which the corresponding Delta model number is PFC0612DE. It should be noted that some sites report the thickness as 35mm instead of 38mm, but according to the spec sheet, the proper thickness to keep in mind is 38mm.
Here's a recap and quick reference for the 2950 fans:
Now, if you've read my previous post, you know that I removed two fans leaving me a max of 120 CFM (~63 per fan). During that time, my CPU temp did not increase above 25 degrees. That means that across all four replacement candidates I can lower the CFM to 30 CFM max for each fan. Your mileage may vary.
On arnuschky's blog, in the comments someone reportedly fitted 60mm x 60mm x 25mm fans, so we don't have to stay with the 38mm thickness. A forum post at overclock.net provides insight into re-mapping the power pins from different fans into Dell's power connectors.
Keeping that mind, here is a list of potential replacements:
Read More
To find a suitable replacement, we must first analyze the existing fans so we know the baseline for comparison. Dell PowerEdge 2950's come with Delta brushless, axial fans in a 60mm x 60mm x 38mm form factor. Dell appeared to utilize three variants, with Dell-approved replacement part numbers including JC972, PR272, YW880, and DC471. The ones in my 2950 are JC972, for which the corresponding Delta model number is PFC0612DE. It should be noted that some sites report the thickness as 35mm instead of 38mm, but according to the spec sheet, the proper thickness to keep in mind is 38mm.
Here's a recap and quick reference for the 2950 fans:
- Dell Part Numbers: JC972, PR272, YW880, DC471
- Delta Part Number: PFC0612DE (I'm sure there are others)
- Form Factor: 60mm x 60mm x 38mm
- Air Flow: up to 67.8 CFM
- RPM: up to 12,000
- NOISE: 61.5 dB (one fan!!)
- Voltage: 12V
- Termination: 4 wire
- Features: PWM Control
The key elements we need to keep in mind for the replacement are the size (60mm x 60mm), air flow, noise, termination, and features.
To see like-manufacturer replacements, I checked Delta's website. Delta has a list of currently available fans in a similar form factor if you put in the correct search parameters. However, in the comments section of the hacking the BMI post, other PowerEdge 2950 owners reported that they swapped the 38mm thickness for thinner fans and they worked fine as long as the replacements had PWM control and a 4-wire termination. Here are some photos for reference:
 |
| Fan Label |
 |
| 4-Pin Connector |
Now, if you've read my previous post, you know that I removed two fans leaving me a max of 120 CFM (~63 per fan). During that time, my CPU temp did not increase above 25 degrees. That means that across all four replacement candidates I can lower the CFM to 30 CFM max for each fan. Your mileage may vary.
On arnuschky's blog, in the comments someone reportedly fitted 60mm x 60mm x 25mm fans, so we don't have to stay with the 38mm thickness. A forum post at overclock.net provides insight into re-mapping the power pins from different fans into Dell's power connectors.
Keeping that mind, here is a list of potential replacements:
- Top Motor PWM Fan 60mm x 25mm ($4.75, max 48.8 dB, max 44.68 CFM)
- Cooljag Everflow 60mm x 25mm PWM Fan (F126025BU) ($9.99, max 33.5 dB, max 24.5 CFM)
- Evercool 60mm x 25mm High Speed PWM Fan (EC6025H12BP) ($9.99, max 36 dB, max 26.63 CFM)
- Nidec Ultraflo U60T12MUA7-57 60mm x 25mm 4-Pin PWM Fan ($4.99, max 32.5 dB, max 23 CFM)
- Dell Fan Assembly 12V DC 0.48A 60 X 25mm For Poweredge 2650 7K412 ($13.95, max 46.5 dB, max 38.35 CFM)
As you can see by visiting the links to these fans, all the power connectors are different with maybe the exception of the last one and would need to be re-pinned. Also, note that they're all thinner, coming in at a 25mm thickness instead of 38mm. Instead of trying to re-pin the power connector, I decided to check Delta's list of model numbers to see if they had a fan that I could use to more easily replace the JC972. To be posted in part 3...
Saturday, March 9, 2013
Labels:
Dell
,
noise reduction
,
PowerEdge 2950

Background
Recently, I've accepted the task to build out a lab using donated equipment so people can practice for cyber security competitions. This donated equipment includes four or five Dell PowerEdge servers; one 2950 and three or four 2850s. After researching the system specs, the 2950 seemed like a good place to start since it was the model that could take the most additional memory. It came with four 512 MB DIMMs (a whole gig!), but we swapped those out with six 4GB DIMMs and an additional two 2GB DIMMs, enabling us to get to 28GB for memory.
Quick side note for others - the memory slots are paired 1-2, 3-4, 5-6, 7-8 so you can't have an odd man out. I actually had five 4GB DIMMs, but I installed the fifth in slot 5 with a 2 GB stick in slot 6, and the start up checks kindly informed me of the mismatch. Once I swapped out the 4GB so slots five through eight were homogeneous, I was good for memory and received no memory check errors.
The Issue
When powering on the 2950, it's idle fan sound is overbearing. I live in a town home, and this server is placed in a closet in the basement 14 feet below the main floor yet I can still hear it whining away. To say this server is loud isn't enough, it's LOUD.
My first attempt at reducing the noise was to remove two of the four chassis fans, since this server isn't going to be heavily tested. I put the cover on, powered it up, and went to the main floor to see the difference. It was definitely an improvement, but I could still clearly hear the humming. An audio meter indicates it's at about 70+ decibels, with two fans removed!
At this point, I figured I needed to take a look at these fans to see if there was a way to control their speed and/or look for acceptable replacements. Research typically reveals one of three things:
Read More
Dell PowerEdge 2950: Silence the Noise, Part 1
Background
Recently, I've accepted the task to build out a lab using donated equipment so people can practice for cyber security competitions. This donated equipment includes four or five Dell PowerEdge servers; one 2950 and three or four 2850s. After researching the system specs, the 2950 seemed like a good place to start since it was the model that could take the most additional memory. It came with four 512 MB DIMMs (a whole gig!), but we swapped those out with six 4GB DIMMs and an additional two 2GB DIMMs, enabling us to get to 28GB for memory.
Quick side note for others - the memory slots are paired 1-2, 3-4, 5-6, 7-8 so you can't have an odd man out. I actually had five 4GB DIMMs, but I installed the fifth in slot 5 with a 2 GB stick in slot 6, and the start up checks kindly informed me of the mismatch. Once I swapped out the 4GB so slots five through eight were homogeneous, I was good for memory and received no memory check errors.
The Issue
When powering on the 2950, it's idle fan sound is overbearing. I live in a town home, and this server is placed in a closet in the basement 14 feet below the main floor yet I can still hear it whining away. To say this server is loud isn't enough, it's LOUD.
My first attempt at reducing the noise was to remove two of the four chassis fans, since this server isn't going to be heavily tested. I put the cover on, powered it up, and went to the main floor to see the difference. It was definitely an improvement, but I could still clearly hear the humming. An audio meter indicates it's at about 70+ decibels, with two fans removed!
At this point, I figured I needed to take a look at these fans to see if there was a way to control their speed and/or look for acceptable replacements. Research typically reveals one of three things:
- Brent Ozar's fine post about quieting a PowerEdge 1950
- Another author's post on hacking the BMI
- Multiple forums of people telling 2950 owners to buy a new box
Brent's post provides great advice on switching out the fans for a 1950, but the fans mentioned in his post are a different size than the 60mm x 60mm x 35mm of the 2950 fans.
Hacking the BMI seemed a little intimidating to start off with, so I decided to pursue that as the last option.
This equipment was donated expressly because of the lack of funds, so option 3 is out.
I decided to research alternate fans first...
Labels:
Dell
,
PowerEdge 2950
,
RAID

The Dell PowerEdge 2950 comes with a hardware RAID controller, which needs to be invoked during boot (press Ctrl + R at the prompt). Once the PERC 5/i Integrated BIOS Configuration Utility loads, you can follow the handy guide over at thegeekstuff.com to set up the hardware RAID. Their guide cites the PERC 6/i, but the steps are the same.
Thanks, Ramesh (the author)!
I have four 2TB disks installed, and I selected them all to participate in the RAID-5. Some brief research reveals that in a RAID-5 with four disks, all parity bits are stored on one drive. I would ask if anyone could confirm that, but I'm R'ingTFM. In the mean time though, feel free to chime in. :)
Update: Make sure after you stage the RAID, you select your Virtual Disk and press either the right arrow key or enter. In the Initialization menu, there will be a Fast Initialization which you definitely want to select. It will save you hours of build time (48 in my case). It may pop up and tell you there's an initialization already in progress, but go ahead and break that one to start the fast init. Add it the lessons learned!
Read More
Dell PowerEdge 2950: Staging the RAID
Thanks, Ramesh (the author)!
I have four 2TB disks installed, and I selected them all to participate in the RAID-5. Some brief research reveals that in a RAID-5 with four disks, all parity bits are stored on one drive. I would ask if anyone could confirm that, but I'm R'ingTFM. In the mean time though, feel free to chime in. :)
Update: Make sure after you stage the RAID, you select your Virtual Disk and press either the right arrow key or enter. In the Initialization menu, there will be a Fast Initialization which you definitely want to select. It will save you hours of build time (48 in my case). It may pop up and tell you there's an initialization already in progress, but go ahead and break that one to start the fast init. Add it the lessons learned!
Subscribe to:
Posts
(
Atom
)


